- HOME ›
- Speech delivery ›
- Cue cards
Cue cards for public speaking
How to make cue cards & use them effectively
By: Susan Dugdale
Making good cue cards from standard office supply index or note cards to help you confidently deliver an extemporaneous speech is relatively easy. And using them well will lift the quality of your presentation immeasurably. (Truly! I promise you that's not hyperbole. ☺)
What's on this page
Step-by-step guidelines on how to make cue cards and use them well:
- what are cue cards?
- the benefits of using cue cards
- the materials required to make cue cards
- the 10 features of an effective cue card
- how to write up cue cards - the 3-step process to get from a speech outline to cue cards that work the way you want them to
- how to rehearse with cue cards
- the difference between cue cards and flash cards
What are cue cards?
Cue* or note cards, used by speakers when making an extemporaneous speech*, are typically handheld. They are about 4 inches by 6 inches in size, with carefully selected and ordered words and phrases written on them. These act as prompt to help speakers remember what they have to say.
*A cue is a signal or a prompt to say or do something.
*extemporaneous speech -a well-prepared speech that relies on research, clear
organization, and practiced delivery, but is neither read nor completely memorized.
The benefits of using cue cards
People who do not use cue cards to help them deliver a prepared speech either read it from a word-for-word printout or rely entirely on their memory.
However, both these delivery methods have potential traps for the unwary.
- Reading a speech well is a skill and like any skill it needs work to become proficient at it. Someone who hasn't practiced reading aloud is very likely to be difficult to listen to and to watch.
- Opting to deliver a speech entirely from memory is only effective if you've done enough practice. A blank-out and trying to chase down lost words in front of an audience can be hard to recover from. (There is no safety-net!)
Enter cue cards!
The benefits of using cue cards well are:
- Not being anchored to a podium reading the entire text of your speech. This enables you to freely interact with your audience:
-to make eye contact,
-to observe and readily respond, for instance to clarify a point you can see has not been understood, to leave out bits you can tell are not wanted or needed...,
-to gesture and move easily. - Not being left stranded and floundering because you have forgotten important details, or the sequence of your material. Cue cards are reassuring.
A well-prepared set of cue cards will give you confidence. You will sound, look and feel more present, and your entire delivery will have more life, more energy!
For those of you who are nervous about making the transition from the safety of a complete sentence by sentence script to note cards, don't be. Take it slowly. Give yourself time to thoroughly prepare and rehearse with them, and you'll be delighted with the result.
How to make cue cards
The materials needed
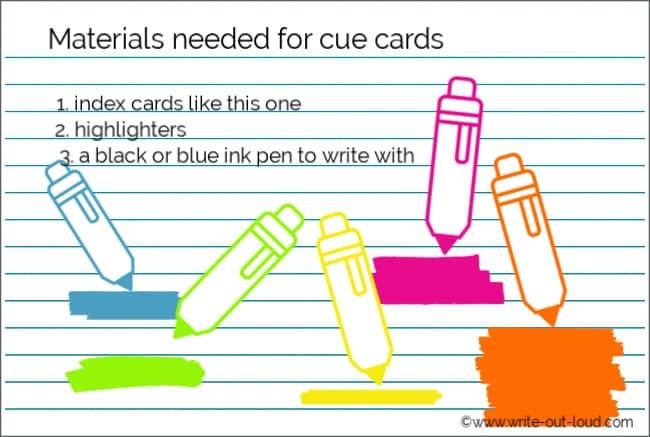
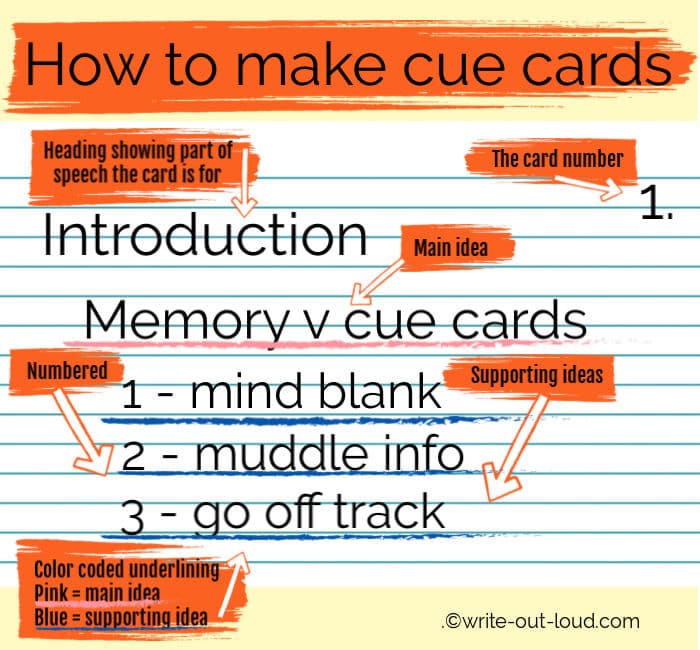
You'll need a packet of standard index cards, similar to the one in the illustration below, a selection of highlighters, (for example, yellow, pink, blue and green), and an easily-read pen. I suggest using one with either blue or black ink.
The 10 features of good cue cards
The information you put on your cards and how you lay it out is critically important. You need to be able to read and understand them at a glance. (See the illustration below)
The most user-friendly cue cards:
- have ONE main subject heading or idea per card
- have a heading showing which part of the speech the card belongs to
- are written or printed clearly using larger than usual font - so you can read them easily
- have plenty of white space around each word or phrase to help them stand out
- use bullet points or numbers to itemize the supporting ideas under the main heading
- are written on ONE side of the card only
- are clearly numbered so that you know the order they come in and it can be a good idea to tie them together.
Use a hole punch to make a hole through the left corner of your cards and tie with a loop of string long enough to allow them to be flipped. The advantage of that is if you drop or somehow get them out of sequence, you're not scrabbling around trying to get them back into the right order and find where you'd got up to while being watched. That can be tough with dozens of pairs of eyes on you!
- are color-coded to show your main idea, supporting ideas, examples and transitions or links.
- have where props are to be shown. For example: Main Idea One - Supporting Idea - Example - Show slide 1
- have approximate timings marked so you can track yourself through your allotted time. If you find you're going over you can adjust by leaving out an extra example or conversely if you're under time, you can add one in.
Preparing your speech for cue cards
Before starting the cue cards you need to make sure your speech is fully prepared.
The next 3 steps are an essential part of the preparation process.
1. Reviewing your speech outline
Using your speech outline go through from the beginning checking the sequence of ideas, supporting material and transitions to ensure all your information is in an effective and logical sequence. (And if you haven't made an outline yet download and use the blank one available from the link below.)
Have you outlined your speech?
If you haven't got a speech outline already prepared ...
Use the printable blank speech outline template you'll find on this page: sample speech outline. It will make preparing your cue cards a breeze.
2. Try your speech out loud
Use your outline to try your speech out loud. Say it through as if you were actually giving it and time yourself.
Remember to allow for pausing, waiting for the audience to finish laughing before you begin talking again, and so on.
You may need to edit if it's too long and it's a lot easier to do that at this stage.
3. Feedback
Once you have the length right for your time allowance, ask a few people whose judgment you trust to listen to you give your speech. Have them give you feedback on its content, structure and delivery, paying particular attention to the introduction and the close.
(For more information see speech evaluation| giving and receiving meaningful feedback.)
Use the feedback you've been given to rework your speech if you need to.
When you're satisfied you have it the best it can possibly be, you're ready to prepare it for cue cards.
Getting from outline to writing up your cue cards
Identifying good keywords and phrases
Each segment or part of your speech, from its introduction to conclusion, should be reducible to a key word or phrase. The phrase or keyword will act as a prompt, or trigger, making you immediately remember what it was you wanted to say.
Before you can write your cue cards you need to go through your speech outline and choose a word or phrase that best represents what each part is about.
Once you've finished, you're ready to write up your cards using the 1-10 guidelines above.
Test your cards as you make them
Double check the effectiveness of each card as you write them to make sure you are using keywords or phrases that actually do trigger your memory.
This is also particularly important for links or transitions. Forgetting how you got from one piece of information to the next not only leaves you stranded but your audience as well.
NB. Be sure to note the names of important people, facts or processes too.
A word of warning
Do not be tempted to print or write the whole of your speech out, then cut it into bits and stick those bits onto cue card sized pieces of cardboard. * It will defeat your purpose entirely.
You'll finish with ridiculously cramped notes that, as well as being difficult to read, stop you from freely interacting with your audience. You'll be head down trying to decipher what you wrote!
*(I've seen it in action! Occasionally one of my student's would try it and the result was never, ever good.)
Rehearsing with your cue cards

You'll find a full page here on 'how to rehearse'.
It includes notes specifically on rehearsing using your cue cards as well as other valuable tips for delivering your speech successfully.
Now that you've completed your set of cards, please don't shortchange yourself by assuming you are fully prepared and ready for delivery.
To use them well you really do need to practice with them. Before you give your speech aim for at least three concentrated rehearsal sessions and do more if possible.
Cue cards and flash cards. What's the difference?
The principal difference between them is their purpose.
Flash cards are used to help memorize information for example, vocabulary lists for a new language you're learning, the sequence of events leading to the outbreak of WW2, or the names and placement of all the bones in the human body.
They frequently have diagrams and pictures as well as words on them to make the information easier to remember.
The goal or purpose of them is instant recall. They are extensively used by students, particularly as part of their exam preparation.
In comparison, cue cards are generally larger than flash cards and have less information on them - just an ordered sequence of a speech's key words and phrases.
Whereas flash cards are used prior to an examination or test, cue cards are used during a presentation. Their purpose is to prompt or remind the speaker to say what they wanted to.


About the Author: Susan Dugdale, founder of write-out-loud.com, is a qualified teacher of English and drama with over 40 years of experience. Drawing on her professional expertise and her personal journey from shyness to confidence, Susan creates practical, real-world resources to help people find their voice and speak with power.
